.NET Windows Services
Introduction
Windows Services are long running executable applications that have no User Interface, can be configured to start automatically and can also be started manually. Windows services are not meant to interact with users and should not have a user interface. These applications are actually controlled by the Service Control Manager. This article discusses Windows Services and shows how we can implement a simple Windows Service in C#.
What are Windows Services?
Windows services are long running executable applications that typically do not possess any user interface, are controlled by the Service Control Manager (SCM) and can even be configured to start automatically after the system boots. They typically execute in their own windows sessions. They can execute even if the user has not logged in to the system. They can even be started, paused, re-started manually. These applications are somewhat similar to the daemon processes of UNIX in the sense that they remain dormant most of the time and execute in the background as and when needed.
Why are Windows Services needed?
The following are the benefits of using Windows Services:
· Network connection management
· Disk access monitoring
· Security control of application
· Log messages related to the application's requirements
Anatomy of a Windows Service Application
This section briefly discusses the anatomy of a Windows Service application. The .NET Framework's System.ServiceProcess.ServiceBase encapsulates the entire functionality that is required to create and control Windows Service applications.
The following two classes are required for implementing a Windows Service:
· System.ServiceProcess.ServiceBase
· System.Configuration.Install.Installer
The ServiceBase class must be inherited by your Service class to specify your Service and the Installer class should be inherited in your Installer class to specify the Service installer.
The following are the methods of ServiceBase class.
· OnStart
· OnStop
· OnPause
· OnContinue
· OnShutdown
· OnPowerEvent
· OnCustomCommand
The following section discusses these methods briefly.
OnStart: This method is fired when the service is started by the Service Control Manager. It should be noted that this method is called only once during the life cycle. This method is used to specify the processing that occurs when a Start command is received.
OnStop: This method is called when the service is stopped by the Service Control Manager. This is typically used to specify the processing that occurs when a Stop command is received by the Service Control Manager.
OnPause: This method is called when the service is paused and typically contains the processing for pausing the service.
OnContinue: This method is called when the service is resumed after being paused. This method typically contains the necessary processing so as to enable a service to return to normal functioning after the same was paused earlier.
OnShutDown: This method is called when the system is being shutdown and contains the necessary processing indicative of what should happen prior to the system shutting down.
OnPowerEvent: This method is used to specify the necessary processing that should take place when the power status changes.
OnCustomCommand: This method is used to specify a custom command, i.e., any command other than those discussed above.
In addition to the above methods, the System.ServiceProcess.ServiceBase class also contains the following properties:
· AutoLog
· CanPauseAndContinue
· CanShutdown
· CanStop
· ServiceName
The following section discusses these properties briefly.
CanStop: This is a boolean property that is true if the service can be stopped, false otherwise.
CanShutdown: This is a boolean property that is true if the service wants to be notified that the system on which it is being executed is being shutdown, false otherwise.
CanPauseAndContinue: This is a boolean property that is true if the service can be paused and then restarted, false otherwise.
CanHandlePowerEvent: This is a boolean property that is set to true if the service should be notified of a change in the power status of the system on which the service is being executed.
AutoLog: This is a boolean property that is set to true if the service should write events to the Application Event Log when any action is performed.
Implementing a Simple Windows Service Application in .NET
This section makes use of the concepts learned so far and shows how we can implement a simple Windows Service in .NET.
Creating the Windows Service
To create a new project in Visual Studio .NET 2003, select C# as the language of your choice and then select Windows Service as the project. Specify the name of the project and save the same. Note that when implementing a Windows Service, you should have two classes, one is the Service class and the other is the Service Controller class. Refer to the following listings that contain the source code for both the custom Service and the custom ServiceController classes.
Listing 1: The Sample Windows Service Class
using System;
using System.Collections;
using System.ComponentModel;
using System.Data;
using System.Diagnostics;
using System.ServiceProcess;
using System.IO;
namespace SampleWindowsService
{
public class SampleWindowsService: System.ServiceProcess.ServiceBase
{
StreamWriter streamWriter;
private System.ComponentModel.Container components = null;
public SampleWindowsService()
{
InitializeComponent();
}
static void Main()
{
System.ServiceProcess.ServiceBase[]ServicesToRun;
ServicesToRun = new System.ServiceProcess.ServiceBase[]
{
new SampleWindowsService()
};
System.ServiceProcess.ServiceBase.Run(ServicesToRun);
}
private void InitializeComponent()
{
components = new System.ComponentModel.Container();
this.ServiceName = "Sample Service";
}
protected override void Dispose(bool disposing)
{
if (disposing)
{
if (components != null)
{
components.Dispose();
}
}
base.Dispose(disposing);
}
protected override void OnStart(string[]args)
{
streamWriter = new StreamWriter(new FileStream(
"C:\\SampleWindowsServiceLogger.txt", System.IO.FileMode.Append));
this.streamWriter.WriteLine("Starting Sample Windows Service at " +
DateTime.Now.ToString());
this.streamWriter.Flush();
this.streamWriter.Close();
}
protected override void OnStop()
{
streamWriter = new StreamWriter(new FileStream(
"C:\\SampleWindowsServiceLogger.txt", System.IO.FileMode.Append));
this.streamWriter.WriteLine("Stopping Sample Windows Service at " +
DateTime.Now.ToString());
this.streamWriter.Flush();
this.streamWriter.Close();
}
}
}
Listing 2: The Sample Windows Service Installer Class
using System;
using System.Collections;
using System.ComponentModel;
using System.ServiceProcess;
using System.Configuration.Install;
namespace SampleWindowsService
{
[RunInstaller(true)]
public class SampleWindowsServiceInstaller:
System.Configuration.Install.Installer
{
private System.ComponentModel.Container components = null;
public SampleWindowsServiceInstaller()
{
InitializeComponent();
ServiceProcessInstaller spi = new ServiceProcessInstaller();
ServiceInstaller si = new ServiceInstaller();
si.DisplayName = "Sample Windows Service";
si.ServiceName = "Sample Windows Service";
si.StartType = ServiceStartMode.Automatic;
this.Installers.Add(si);
spi.Account = ServiceAccount.LocalSystem;
spi.Username = null;
spi.Password = null;
this.Installers.Add(spi);
}
protected override void Dispose(bool disposing)
{
if (disposing)
{
if (components != null)
{
components.Dispose();
}
}
base.Dispose(disposing);
}
private void InitializeComponent()
{
components = new System.ComponentModel.Container();
}
}
}
The Windows Service implemented in this article stores the time of starting, stopping or resuming the service in a file C:\\SampleWindowsServiceLogger.txt in the local file system. Make changes to implement the service that can suit your needs.
Start, stop and resume the Windows Service
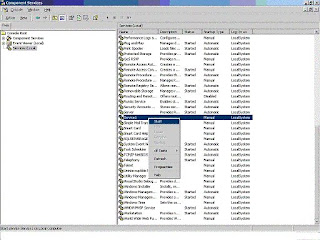
Go to Control Panel | Administrative Tools | Computer Management and select the Services and Applications tab. Then locate your installed service and click on Start to start the service. The rest is self explanatory.
Installing the Windows Service
In order to install the Windows Service implemented above, use the installutil .NET Framework command line utility. Specify the following at the command prompt.
Installutil SampleWindowsServiceInstaller.exe
Un-Installing the Windows Service
In order to uninstall the Windows service, specify the following at the command prompt:
Installutil /u SampleWindowsServiceInstaller.exe
Important Points
You should note that a Microsoft .NET service will not start if the application event log is full. Hence, it is recommended to clear the event log down and set to overwrite as needed. Remember inheriting the ServiceBase class to create you Service class and the System.Configuration.Install.Installer class when implementing your Service Controller class.
---------------------- Part II -----------------------
Windows Services Defined
Every time a user logs on the NT machine, a desktop is immediately assigned to him. Any process or thread started by the user is attached to this desktop. Multiple desktops can exist, but only one desktop can be active at a time. These desktops each have threads assigned to them. Windows can be created in each of these threads, but only those windows in threads assigned to the active desktop are visible.
Windows services are processes that exist without any desktops and run in the background (similar to daemon processes in UNIX). They can be started before any user logs into the system. After the operating system is initially loaded, it immediately begins loading the services that are configured to automatically start. The user can log on to the system before all automatic services are loaded, but the user is not presented with a desktop until all the automatic services have finished loading. After logging on, the user can start and stop the services. When the user logs off, the desktop is closed and all the processes assigned to his desktop are also closed. But any services that exist when the user logs off are not closed and remain alive and running. They are often loaded at boot up, before any user logs in, and are often independent of any specific user logged on at the time. In fact, a service has its own login session. A service can also be launched manually by a user. Although it’s possible, Windows Service typically has no user interface.
The Need for Windows Services
The fact that services can exist without desktops is the advantage that makes services desirable. The various situations during which a process is installed as a service are:
· When a process is needed that starts when the computer starts and stops only when computer stops
· Hardware drivers, or applications controlling or monitoring hardware attached to a system; e.g. monitoring for plug and play devices
· A process is required that operates even when no users are logged on to the computer; e.g. Anti Virus programs, Disk Monitoring programs etc.
· Parts of Operating System itself; e.g. RPC (Remote Procedure Call) server, DCOM (Distributed Component Object Model) server, etc.
· Software which handles communication from users on other machines, who have logged on to this machine; e.g. FTP Server, Web Server etc.
Service Control Manager (SCM)
Due to the fact that services have no desktops, they usually do not interact with the users. But there has to be a way for controlling and managing these services. Service Control Manager does just that.
The SCM, a part of the windows kernel, is the one that controls the lifetime of the service. Any process that needs to be started and stopped like a service has to register itself with the SCM. The SCM then takes care of when to launch the service and when to stop it. The SCM holds a list of all the installed services, when they should be started, whether they should be allowed to interact with the desktop, etc.
The administrator can control services by sending control requests to them (e.g. "start service", "stop service", etc.) via the SCM. This is done using the Services applet of the control panel; double-clicking on the icon brings up the Services window, which lists all the services in the SCM database. Another utility to view the services running is WinMsd.exe. Combining the functionalities available in these two utilities, with an additional capability to control and configure the services on remote computers is Service Controller (SC.exe). This utility is not pre-installed with windows and has to be downloaded to every computer that needs it. All these utilities use the SCM to communicate with the services.
The SCM maintains its database of services installed in the system in the registry. Each service has an entry in the following key:
HKEY_LOCAL_MACHINE\SYSTEM\CurrentControlSet\Services\
Here, the Service Name is the name of the service used by the SCM. The service name seen in the Services applet is different from this one. This is a unique name used internally by the SCM. The corresponding name of each service which is displayed in the applet is stored in the key Display Name inside the Service Name key.
Each service can run by logging on as either a Local System or particular user account. Also the services can be enabled or disabled for specific hardware profile. Each service could either run independently or it will depend on some other service(s). The list of services each service depends on will be maintained by the SCM. All these information could be seen from the Services applet by looking at the properties of each service. Other than the list of services a particular service depends on, a list of services that depend on this service can also be seen.
When a service fails, the SCM can decide what action to take. These can be specified directly through the Service applet. The possible actions are:
· Restart the service
· Run a particular file
· Reboot the computer
· Take no action
By default the response for a failure is to take no action. If the service fails for the second time too, one of these actions can be set. For subsequent failures, another action could be assigned.
Building a service is a little complicated in the sense that a certain steps have to be followed to successfully build and install a service. Prior to .NET, the only efficient way to build a .NET was by building it in C++/ VC++. It was complicated and had various issues to be considered while doing it. But .NET has changed the way the services were build. With its Framework Base Classes available as a part of the .NET Framework, building services were made easy. By taking advantage of the object oriented capability of .NET, various tasks needed to build a service has been greatly simplified by encapsulating them inside various classes and including them as a part of the .NET Framework Base Classes. These base classes in the .NET Framework take care of the system-level interfacing
.NET Approach to Windows Services
When .NET is used to create services, the steps involved in doing it are reduced. Much of the functionalities and system level interactions are wrapped inside classes and available as a part of the Framework Base Classes. Any .NET language can be used to create Windows Services. Two base classes needed for creating the Windows Services are
System.ServiceProcess.ServiceBase
System.Configuration.Install.Installer
System.ServiceProcess.ServiceBase provides the base class for the service itself. The class that inherits from this class contains the logic that runs in the service. System.Configuration.Install.Installer provides the interface necessary to get the service installed under Windows 2000 and NT. It isn't typically necessary to put any logic in the installer class. There can be more than one service in a project. The installer class creates one ServiceProcessInstaller object (which knows how to install the service with the SCM), and a ServiceInstaller object. The ServiceInstaller object writes information to the registry which is needed for installation. A subkey is added under
HKEY_LOCAL_MACHINE\SYSTEM\CurrentControlSet\Services\
In VB.NET, any project created as a service will automatically create a class that inherits from the System.ServiceProcess.ServiceBase class. But the installer class has to be included manually. A Windows Service has a special installation procedure that handles all the operating-system communications necessary to execute a service. A special command-line program in .NET named InstallUtil.exe installs and uninstalls Windows Services produced in .NET.
In VB.NET, the steps that are followed to develop a Windows Service are:
1. Create Windows Service project in Visual Basic.NET
2. Add installer to project
3. Add/change logic and build the executable for the service
4. Install the service using InstallUtil.exe
5. Start the service using the Service applet in the Control Panel
The same applet can be used to stop the service. The InstallUtil.exe can be used again to uninstall the service. This is done by passing the ‘/u’ attribute
Building Windows Services
A windows service exists as an executable file and may contain more than one service. The behavior of each of the service is defined by writing a class for each that inherits from the ServiceProcess.ServiceBase class and code can be added to handle various methods provided by this class. The service can provide code for OnStart, OnStop, OnPause, OnContinue, and OnShutdown methods called by the SCM as a user interacts with the service. None of these procedures are required, but they can be used to provide specific behavior in reaction to requests from the SCM’s user interface, or programmatically from other services.
The steps to be taken to create windows services under .NET:
1. Create a new project in .NET by choosing the ‘Windows Services’ template. The project can either be VB.NET or C#.
2. A class named Service1 will be created. Open the class in design view. This can be done either by pressing Shift+F7 or choose View | Designer menu item.
3. The properties could be set as necessary. The three Boolean properties – CanPauseAndContinue, CanShutDown, and CanStop- control the behavior of the service.
4. Add startup code. The service’s OnStart event can be used to set up the service and data structures used, and perhaps log information to the event log. Also code to handle the OnContinue, OnCustomCommand, OnPause, OnShutdown, and OnStop events.
Add an Installer. This can be done by going to the service class’s design view as done in step 2. Now, clicking on the ‘Add Installer’ will add the installer classes.
Once the Installer class has been added, Visual Studio .NET creates a new project file named ProjectInstaller.cs. This file contains two components:
ServiceProcessInstaller1 and ServiceInstaller1. The properties of the ServiceInstaller1 class will show the service name in ServiceName property as Service1. The ServiceProcessInstaller1 has properties such as UserName and Password as shown in fig 2.0. They will be by default set to ‘Nothing.’ For the installer to be able to install the service, the account information should be supplied. For a simple service the account property of the ServiceProcessInstaller1 could be set to LocalSystem. The ServiceName property of the ServiceInstaller object should be the same name as that of the service class.
Installing Windows Services
Once the steps needed to build the service is over, it should be installed. Following are the steps to do it.
1. Save the project.
2. Build the service’s executable file. Build | Build menu item.
3. Open the Visual Studio .NET Command Prompt item from the start menu. It will be installed as a subitem of the Visual Studio .NET Tools item. This shortcut sets all the path necessary before going to the DOS prompt. Change the folder to the location where the executable is located. It will be found in the bin folder within the folder where the project is stored.
4. Install the service. This can be done by using the InstallUtil tool that comes with the Visual Studio. Use the following command line:
InstallUtil Service1.exe
5 .Start the service. This can be done by running the Windows Service Manager. In the services list, the service now installed will be listed as Service1. Right click and start the service.
6. Now, any Startup events can be viewed by opening the Event Viewer. Select the Application log, and any entries send to the log can be seen there.
Removing and Debugging Windows Services
Removing
Removing the service can be done by running the same InstallUtil tool but with a /u parameter. This will uninstall the service. The entry in the Windows Service Manager will be removed.
Debugging
Because a service has to be compiled and installed before running it, debugging becomes a little more complex than the normal applications. To debug a service, we have to run it and debug the running process. The steps to follow:
1. Install the service and run it.
2. In Visual Studio, select Debug | Processes menu item. Processes dialog box is displayed.
3. Select the Show system processes check box to include the running services.
4. Select the Service1 entry and click Attach. Click OK to accept. Close Processes dialog box.
5. Set the breakpoint in the code at the location to be tested.
6. Trigger the breakpoint by taking necessary action. For example, if the breakpoint is in the OnStop procedure, stop the processes to invoke it. Now single stepping can be done. To continue F5 should be pressed.
7. Then after the debugging is finished, detach the process by using the Debug | Processes menu. Select the service and click Detach.
Use the Debug | Stop Debugging menu item to stop debugging session.
Example
As a simple example, the following code can be used to test a service. Once the steps are followed to create a service, procedures for handling the start and stop event of the service is automatically created. These events can be tested by putting a log entry. The code might look like this:
For C# project:
protected override void OnStart(string[] args)
{
EventLog.WriteEntry( String.Format("Process Starting…") );
}
For Visual Basic project:
Protected Overrides Sub OnStart(ByVal args() As String)
EventLog.WriteEntry( String.Format("Process Starting…"))
End Sub
The logged entry can be viewed from the Event Viewer applet.
Various Classes Available in .NET to Deal with Windows Services
The System.ServiceProcess namespace provides classes that allow you to implement, install, and control Windows service applications. The various classes available within this namespace are:
Classes
Class & Description
ServiceBase
Provides a base class for a service that will exist as part of a service application. ServiceBase must be derived when creating a new service class.
ServiceController
Represents a Windows service and allows you to connect to a running or stopped service, manipulate it, or get information about it.
ServiceControllerPermission
Allows control of code access security permissions for service controllers.
ServiceControllerPermissionAttribute
Allows declarative service controller permission checks.
ServiceControllerPermissionEntry
Defines the smallest unit of a code access security permission that is set for a ServiceController.
ServiceControllerPermissionEntryCollection
Contains a strongly-typed collection of ServiceControllerPermissionEntry objects.
ServiceInstaller
Installs a class that extends ServiceBase to implement a service. This class is called by the install utility when installing a service application.
ServiceProcessDescriptionAttribute
Specifies a description for a property or event.
ServiceProcessInstaller
Installs an executable containing classes that extend ServiceBase. This class is called by installation utilities, such as InstallUtil.exe, when installing a service application.
TimeoutException
The exception that is thrown when a specified timeout has expired.
Enumerations
Enumeration & Description
PowerBroadcastStatus
Indicates the system's power status.
ServiceAccount
Specifies a service's security context, which defines its logon type.
ServiceControllerPermissionAccess
Defines access levels used by ServiceController permission classes.
ServiceControllerStatus
Indicates the current state of the service.
ServiceStartMode
Indicates the start mode of the service.
ServiceType
Represents the type of the service.
Conclusion
By taking advantage of the Framework Base Classes, the complexity needed to create a service is greatly reduced. This lets the developer to concentrate more on the functionality of the service instead of spending time in creating it.
Windows Services are long running executable applications that have no User Interface, can be configured to start automatically and can also be started manually. Windows services are not meant to interact with users and should not have a user interface. These applications are actually controlled by the Service Control Manager. This article discusses Windows Services and shows how we can implement a simple Windows Service in C#.
What are Windows Services?
Windows services are long running executable applications that typically do not possess any user interface, are controlled by the Service Control Manager (SCM) and can even be configured to start automatically after the system boots. They typically execute in their own windows sessions. They can execute even if the user has not logged in to the system. They can even be started, paused, re-started manually. These applications are somewhat similar to the daemon processes of UNIX in the sense that they remain dormant most of the time and execute in the background as and when needed.
Why are Windows Services needed?
The following are the benefits of using Windows Services:
· Network connection management
· Disk access monitoring
· Security control of application
· Log messages related to the application's requirements
Anatomy of a Windows Service Application
This section briefly discusses the anatomy of a Windows Service application. The .NET Framework's System.ServiceProcess.ServiceBase encapsulates the entire functionality that is required to create and control Windows Service applications.
The following two classes are required for implementing a Windows Service:
· System.ServiceProcess.ServiceBase
· System.Configuration.Install.Installer
The ServiceBase class must be inherited by your Service class to specify your Service and the Installer class should be inherited in your Installer class to specify the Service installer.
The following are the methods of ServiceBase class.
· OnStart
· OnStop
· OnPause
· OnContinue
· OnShutdown
· OnPowerEvent
· OnCustomCommand
The following section discusses these methods briefly.
OnStart: This method is fired when the service is started by the Service Control Manager. It should be noted that this method is called only once during the life cycle. This method is used to specify the processing that occurs when a Start command is received.
OnStop: This method is called when the service is stopped by the Service Control Manager. This is typically used to specify the processing that occurs when a Stop command is received by the Service Control Manager.
OnPause: This method is called when the service is paused and typically contains the processing for pausing the service.
OnContinue: This method is called when the service is resumed after being paused. This method typically contains the necessary processing so as to enable a service to return to normal functioning after the same was paused earlier.
OnShutDown: This method is called when the system is being shutdown and contains the necessary processing indicative of what should happen prior to the system shutting down.
OnPowerEvent: This method is used to specify the necessary processing that should take place when the power status changes.
OnCustomCommand: This method is used to specify a custom command, i.e., any command other than those discussed above.
In addition to the above methods, the System.ServiceProcess.ServiceBase class also contains the following properties:
· AutoLog
· CanPauseAndContinue
· CanShutdown
· CanStop
· ServiceName
The following section discusses these properties briefly.
CanStop: This is a boolean property that is true if the service can be stopped, false otherwise.
CanShutdown: This is a boolean property that is true if the service wants to be notified that the system on which it is being executed is being shutdown, false otherwise.
CanPauseAndContinue: This is a boolean property that is true if the service can be paused and then restarted, false otherwise.
CanHandlePowerEvent: This is a boolean property that is set to true if the service should be notified of a change in the power status of the system on which the service is being executed.
AutoLog: This is a boolean property that is set to true if the service should write events to the Application Event Log when any action is performed.
Implementing a Simple Windows Service Application in .NET
This section makes use of the concepts learned so far and shows how we can implement a simple Windows Service in .NET.
Creating the Windows Service
To create a new project in Visual Studio .NET 2003, select C# as the language of your choice and then select Windows Service as the project. Specify the name of the project and save the same. Note that when implementing a Windows Service, you should have two classes, one is the Service class and the other is the Service Controller class. Refer to the following listings that contain the source code for both the custom Service and the custom ServiceController classes.
Listing 1: The Sample Windows Service Class
using System;
using System.Collections;
using System.ComponentModel;
using System.Data;
using System.Diagnostics;
using System.ServiceProcess;
using System.IO;
namespace SampleWindowsService
{
public class SampleWindowsService: System.ServiceProcess.ServiceBase
{
StreamWriter streamWriter;
private System.ComponentModel.Container components = null;
public SampleWindowsService()
{
InitializeComponent();
}
static void Main()
{
System.ServiceProcess.ServiceBase[]ServicesToRun;
ServicesToRun = new System.ServiceProcess.ServiceBase[]
{
new SampleWindowsService()
};
System.ServiceProcess.ServiceBase.Run(ServicesToRun);
}
private void InitializeComponent()
{
components = new System.ComponentModel.Container();
this.ServiceName = "Sample Service";
}
protected override void Dispose(bool disposing)
{
if (disposing)
{
if (components != null)
{
components.Dispose();
}
}
base.Dispose(disposing);
}
protected override void OnStart(string[]args)
{
streamWriter = new StreamWriter(new FileStream(
"C:\\SampleWindowsServiceLogger.txt", System.IO.FileMode.Append));
this.streamWriter.WriteLine("Starting Sample Windows Service at " +
DateTime.Now.ToString());
this.streamWriter.Flush();
this.streamWriter.Close();
}
protected override void OnStop()
{
streamWriter = new StreamWriter(new FileStream(
"C:\\SampleWindowsServiceLogger.txt", System.IO.FileMode.Append));
this.streamWriter.WriteLine("Stopping Sample Windows Service at " +
DateTime.Now.ToString());
this.streamWriter.Flush();
this.streamWriter.Close();
}
}
}
Listing 2: The Sample Windows Service Installer Class
using System;
using System.Collections;
using System.ComponentModel;
using System.ServiceProcess;
using System.Configuration.Install;
namespace SampleWindowsService
{
[RunInstaller(true)]
public class SampleWindowsServiceInstaller:
System.Configuration.Install.Installer
{
private System.ComponentModel.Container components = null;
public SampleWindowsServiceInstaller()
{
InitializeComponent();
ServiceProcessInstaller spi = new ServiceProcessInstaller();
ServiceInstaller si = new ServiceInstaller();
si.DisplayName = "Sample Windows Service";
si.ServiceName = "Sample Windows Service";
si.StartType = ServiceStartMode.Automatic;
this.Installers.Add(si);
spi.Account = ServiceAccount.LocalSystem;
spi.Username = null;
spi.Password = null;
this.Installers.Add(spi);
}
protected override void Dispose(bool disposing)
{
if (disposing)
{
if (components != null)
{
components.Dispose();
}
}
base.Dispose(disposing);
}
private void InitializeComponent()
{
components = new System.ComponentModel.Container();
}
}
}
The Windows Service implemented in this article stores the time of starting, stopping or resuming the service in a file C:\\SampleWindowsServiceLogger.txt in the local file system. Make changes to implement the service that can suit your needs.
Start, stop and resume the Windows Service
Go to Control Panel | Administrative Tools | Computer Management and select the Services and Applications tab. Then locate your installed service and click on Start to start the service. The rest is self explanatory.
Installing the Windows Service
In order to install the Windows Service implemented above, use the installutil .NET Framework command line utility. Specify the following at the command prompt.
Installutil SampleWindowsServiceInstaller.exe
Un-Installing the Windows Service
In order to uninstall the Windows service, specify the following at the command prompt:
Installutil /u SampleWindowsServiceInstaller.exe
Important Points
You should note that a Microsoft .NET service will not start if the application event log is full. Hence, it is recommended to clear the event log down and set to overwrite as needed. Remember inheriting the ServiceBase class to create you Service class and the System.Configuration.Install.Installer class when implementing your Service Controller class.
---------------------- Part II -----------------------
Windows Services Defined
Every time a user logs on the NT machine, a desktop is immediately assigned to him. Any process or thread started by the user is attached to this desktop. Multiple desktops can exist, but only one desktop can be active at a time. These desktops each have threads assigned to them. Windows can be created in each of these threads, but only those windows in threads assigned to the active desktop are visible.
Windows services are processes that exist without any desktops and run in the background (similar to daemon processes in UNIX). They can be started before any user logs into the system. After the operating system is initially loaded, it immediately begins loading the services that are configured to automatically start. The user can log on to the system before all automatic services are loaded, but the user is not presented with a desktop until all the automatic services have finished loading. After logging on, the user can start and stop the services. When the user logs off, the desktop is closed and all the processes assigned to his desktop are also closed. But any services that exist when the user logs off are not closed and remain alive and running. They are often loaded at boot up, before any user logs in, and are often independent of any specific user logged on at the time. In fact, a service has its own login session. A service can also be launched manually by a user. Although it’s possible, Windows Service typically has no user interface.
The Need for Windows Services
The fact that services can exist without desktops is the advantage that makes services desirable. The various situations during which a process is installed as a service are:
· When a process is needed that starts when the computer starts and stops only when computer stops
· Hardware drivers, or applications controlling or monitoring hardware attached to a system; e.g. monitoring for plug and play devices
· A process is required that operates even when no users are logged on to the computer; e.g. Anti Virus programs, Disk Monitoring programs etc.
· Parts of Operating System itself; e.g. RPC (Remote Procedure Call) server, DCOM (Distributed Component Object Model) server, etc.
· Software which handles communication from users on other machines, who have logged on to this machine; e.g. FTP Server, Web Server etc.
Service Control Manager (SCM)
Due to the fact that services have no desktops, they usually do not interact with the users. But there has to be a way for controlling and managing these services. Service Control Manager does just that.
The SCM, a part of the windows kernel, is the one that controls the lifetime of the service. Any process that needs to be started and stopped like a service has to register itself with the SCM. The SCM then takes care of when to launch the service and when to stop it. The SCM holds a list of all the installed services, when they should be started, whether they should be allowed to interact with the desktop, etc.
The administrator can control services by sending control requests to them (e.g. "start service", "stop service", etc.) via the SCM. This is done using the Services applet of the control panel; double-clicking on the icon brings up the Services window, which lists all the services in the SCM database. Another utility to view the services running is WinMsd.exe. Combining the functionalities available in these two utilities, with an additional capability to control and configure the services on remote computers is Service Controller (SC.exe). This utility is not pre-installed with windows and has to be downloaded to every computer that needs it. All these utilities use the SCM to communicate with the services.
The SCM maintains its database of services installed in the system in the registry. Each service has an entry in the following key:
HKEY_LOCAL_MACHINE\SYSTEM\CurrentControlSet\Services\
Here, the Service Name is the name of the service used by the SCM. The service name seen in the Services applet is different from this one. This is a unique name used internally by the SCM. The corresponding name of each service which is displayed in the applet is stored in the key Display Name inside the Service Name key.
Each service can run by logging on as either a Local System or particular user account. Also the services can be enabled or disabled for specific hardware profile. Each service could either run independently or it will depend on some other service(s). The list of services each service depends on will be maintained by the SCM. All these information could be seen from the Services applet by looking at the properties of each service. Other than the list of services a particular service depends on, a list of services that depend on this service can also be seen.
When a service fails, the SCM can decide what action to take. These can be specified directly through the Service applet. The possible actions are:
· Restart the service
· Run a particular file
· Reboot the computer
· Take no action
By default the response for a failure is to take no action. If the service fails for the second time too, one of these actions can be set. For subsequent failures, another action could be assigned.
Building a service is a little complicated in the sense that a certain steps have to be followed to successfully build and install a service. Prior to .NET, the only efficient way to build a .NET was by building it in C++/ VC++. It was complicated and had various issues to be considered while doing it. But .NET has changed the way the services were build. With its Framework Base Classes available as a part of the .NET Framework, building services were made easy. By taking advantage of the object oriented capability of .NET, various tasks needed to build a service has been greatly simplified by encapsulating them inside various classes and including them as a part of the .NET Framework Base Classes. These base classes in the .NET Framework take care of the system-level interfacing
.NET Approach to Windows Services
When .NET is used to create services, the steps involved in doing it are reduced. Much of the functionalities and system level interactions are wrapped inside classes and available as a part of the Framework Base Classes. Any .NET language can be used to create Windows Services. Two base classes needed for creating the Windows Services are
System.ServiceProcess.ServiceBase
System.Configuration.Install.Installer
System.ServiceProcess.ServiceBase provides the base class for the service itself. The class that inherits from this class contains the logic that runs in the service. System.Configuration.Install.Installer provides the interface necessary to get the service installed under Windows 2000 and NT. It isn't typically necessary to put any logic in the installer class. There can be more than one service in a project. The installer class creates one ServiceProcessInstaller object (which knows how to install the service with the SCM), and a ServiceInstaller object. The ServiceInstaller object writes information to the registry which is needed for installation. A subkey is added under
HKEY_LOCAL_MACHINE\SYSTEM\CurrentControlSet\Services\
In VB.NET, any project created as a service will automatically create a class that inherits from the System.ServiceProcess.ServiceBase class. But the installer class has to be included manually. A Windows Service has a special installation procedure that handles all the operating-system communications necessary to execute a service. A special command-line program in .NET named InstallUtil.exe installs and uninstalls Windows Services produced in .NET.
In VB.NET, the steps that are followed to develop a Windows Service are:
1. Create Windows Service project in Visual Basic.NET
2. Add installer to project
3. Add/change logic and build the executable for the service
4. Install the service using InstallUtil.exe
5. Start the service using the Service applet in the Control Panel
The same applet can be used to stop the service. The InstallUtil.exe can be used again to uninstall the service. This is done by passing the ‘/u’ attribute
Building Windows Services
A windows service exists as an executable file and may contain more than one service. The behavior of each of the service is defined by writing a class for each that inherits from the ServiceProcess.ServiceBase class and code can be added to handle various methods provided by this class. The service can provide code for OnStart, OnStop, OnPause, OnContinue, and OnShutdown methods called by the SCM as a user interacts with the service. None of these procedures are required, but they can be used to provide specific behavior in reaction to requests from the SCM’s user interface, or programmatically from other services.
The steps to be taken to create windows services under .NET:
1. Create a new project in .NET by choosing the ‘Windows Services’ template. The project can either be VB.NET or C#.
2. A class named Service1 will be created. Open the class in design view. This can be done either by pressing Shift+F7 or choose View | Designer menu item.
3. The properties could be set as necessary. The three Boolean properties – CanPauseAndContinue, CanShutDown, and CanStop- control the behavior of the service.
4. Add startup code. The service’s OnStart event can be used to set up the service and data structures used, and perhaps log information to the event log. Also code to handle the OnContinue, OnCustomCommand, OnPause, OnShutdown, and OnStop events.
Add an Installer. This can be done by going to the service class’s design view as done in step 2. Now, clicking on the ‘Add Installer’ will add the installer classes.
Once the Installer class has been added, Visual Studio .NET creates a new project file named ProjectInstaller.cs. This file contains two components:
ServiceProcessInstaller1 and ServiceInstaller1. The properties of the ServiceInstaller1 class will show the service name in ServiceName property as Service1. The ServiceProcessInstaller1 has properties such as UserName and Password as shown in fig 2.0. They will be by default set to ‘Nothing.’ For the installer to be able to install the service, the account information should be supplied. For a simple service the account property of the ServiceProcessInstaller1 could be set to LocalSystem. The ServiceName property of the ServiceInstaller object should be the same name as that of the service class.
Installing Windows Services
Once the steps needed to build the service is over, it should be installed. Following are the steps to do it.
1. Save the project.
2. Build the service’s executable file. Build | Build menu item.
3. Open the Visual Studio .NET Command Prompt item from the start menu. It will be installed as a subitem of the Visual Studio .NET Tools item. This shortcut sets all the path necessary before going to the DOS prompt. Change the folder to the location where the executable is located. It will be found in the bin folder within the folder where the project is stored.
4. Install the service. This can be done by using the InstallUtil tool that comes with the Visual Studio. Use the following command line:
InstallUtil Service1.exe

5 .Start the service. This can be done by running the Windows Service Manager. In the services list, the service now installed will be listed as Service1. Right click and start the service.
6. Now, any Startup events can be viewed by opening the Event Viewer. Select the Application log, and any entries send to the log can be seen there.

Removing and Debugging Windows Services
Removing
Removing the service can be done by running the same InstallUtil tool but with a /u parameter. This will uninstall the service. The entry in the Windows Service Manager will be removed.
Debugging
Because a service has to be compiled and installed before running it, debugging becomes a little more complex than the normal applications. To debug a service, we have to run it and debug the running process. The steps to follow:
1. Install the service and run it.
2. In Visual Studio, select Debug | Processes menu item. Processes dialog box is displayed.
3. Select the Show system processes check box to include the running services.
4. Select the Service1 entry and click Attach. Click OK to accept. Close Processes dialog box.
5. Set the breakpoint in the code at the location to be tested.
6. Trigger the breakpoint by taking necessary action. For example, if the breakpoint is in the OnStop procedure, stop the processes to invoke it. Now single stepping can be done. To continue F5 should be pressed.
7. Then after the debugging is finished, detach the process by using the Debug | Processes menu. Select the service and click Detach.
Use the Debug | Stop Debugging menu item to stop debugging session.
Example
As a simple example, the following code can be used to test a service. Once the steps are followed to create a service, procedures for handling the start and stop event of the service is automatically created. These events can be tested by putting a log entry. The code might look like this:
For C# project:
protected override void OnStart(string[] args)
{
EventLog.WriteEntry( String.Format("Process Starting…") );
}
For Visual Basic project:
Protected Overrides Sub OnStart(ByVal args() As String)
EventLog.WriteEntry( String.Format("Process Starting…"))
End Sub
The logged entry can be viewed from the Event Viewer applet.
Various Classes Available in .NET to Deal with Windows Services
The System.ServiceProcess namespace provides classes that allow you to implement, install, and control Windows service applications. The various classes available within this namespace are:
Classes
Class & Description
ServiceBase
Provides a base class for a service that will exist as part of a service application. ServiceBase must be derived when creating a new service class.
ServiceController
Represents a Windows service and allows you to connect to a running or stopped service, manipulate it, or get information about it.
ServiceControllerPermission
Allows control of code access security permissions for service controllers.
ServiceControllerPermissionAttribute
Allows declarative service controller permission checks.
ServiceControllerPermissionEntry
Defines the smallest unit of a code access security permission that is set for a ServiceController.
ServiceControllerPermissionEntryCollection
Contains a strongly-typed collection of ServiceControllerPermissionEntry objects.
ServiceInstaller
Installs a class that extends ServiceBase to implement a service. This class is called by the install utility when installing a service application.
ServiceProcessDescriptionAttribute
Specifies a description for a property or event.
ServiceProcessInstaller
Installs an executable containing classes that extend ServiceBase. This class is called by installation utilities, such as InstallUtil.exe, when installing a service application.
TimeoutException
The exception that is thrown when a specified timeout has expired.
Enumerations
Enumeration & Description
PowerBroadcastStatus
Indicates the system's power status.
ServiceAccount
Specifies a service's security context, which defines its logon type.
ServiceControllerPermissionAccess
Defines access levels used by ServiceController permission classes.
ServiceControllerStatus
Indicates the current state of the service.
ServiceStartMode
Indicates the start mode of the service.
ServiceType
Represents the type of the service.
Conclusion
By taking advantage of the Framework Base Classes, the complexity needed to create a service is greatly reduced. This lets the developer to concentrate more on the functionality of the service instead of spending time in creating it.
Labels: .NET WindowsService
posted by NMK @ 3:08 AM
![]()
![]()

0 Comments:
Post a Comment
Subscribe to Post Comments [Atom]
<< Home